Illustrating in Three Dimensions
Posted on 3rd October 2011 | Catagories: 3D, Illustration
11 commentsThe model below is the result of little self-initiated project, designed to help me get to grips with realtime hardware rendering in the Maya viewport. I also wanted to establish a complete workflow from design concept all the way through to modelling, texture mapping and CGFX shader rendering (which led to so some unexpected and rather confusing shader coding efforts!) and produce something that maintained a strong illustrative style throughout. The whole thing turned out to be much more interesting and enjoyable than I expected, so I decided to write a bit about my process below and include a few of my progress shots.
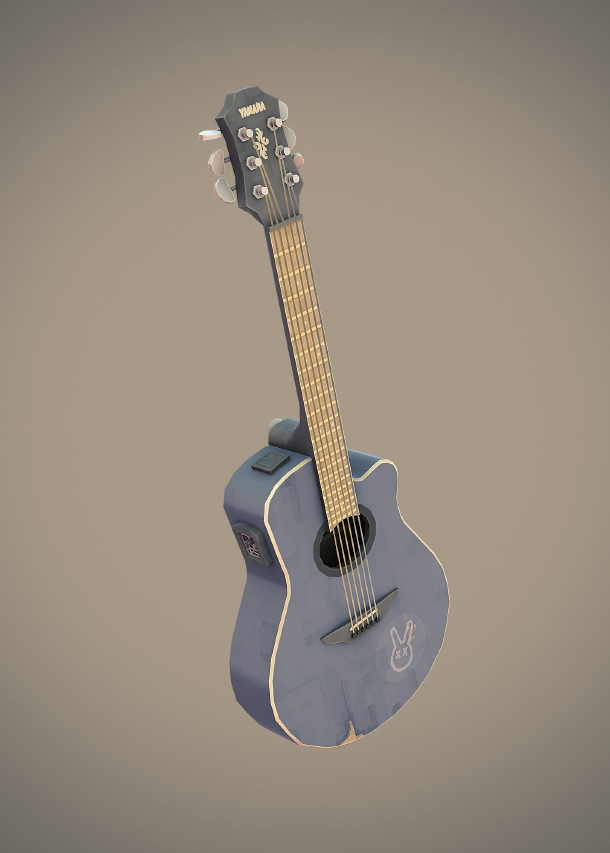
The more I dabble with 3D, the more frustrated I become with the huge render times associated with Mental Ray and other similar rendering engines (sometimes upwards of 30-40 mins per frame), particularly when the final image does little to justify the wait. Anything short of a degree in photorealistic rendering techniques or the patience to juggle an endless set of variables and everything tends to come out looking like your everyday household plastic CGI Junk.
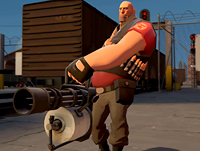

As a reaction to this, I’ve found a growing appreciation for the benefits of lowpoly/realtime graphics, typically seen in some of the less demanding video games of the past few year. If you take away all your fancy Parallax Occlusion maps and Realtime Radiosity you’re left with a reminder that styleis everything.
Perhaps the defining example of this would be Team Fortress 2 by Valve – a game that, while I’ve never really played in great depth, I’ve always admired from a distance for it’s tasteful restraint. In a time where photorealism was considered the holy grail of realtime rendering, Valve took a step back and created a game that could run on even the most basic of systems and still look absolutely stunning. They were able to do this by utilising what they called ‘Illustrative Rendering’ – a technique that involved mimicking the look and feel of a painted 1950’s cartoon and placing more importance in the texture work and overall art direction than any unnecessary technological gimmicks.
Even the 3D animation crowd has begun to embrace a similar approach, with films such as the spectacular Wood by McBess, and Meet Buck by TeamCerf turning their back on the glossy raytracing ideals of Pixar in favour of a more hand-drawn, diffuse lit treatment.
With all this as inspiration, I wanted to set myself a project – to create a fully realised and self contained ‘game asset’ complete with texture maps (diffuse and specular) that could be rendered in realtime in the Maya viewport, be viewed and lit from all angles while maintaining a strong illustrative style and celebrating the lowpoly aesthetic.
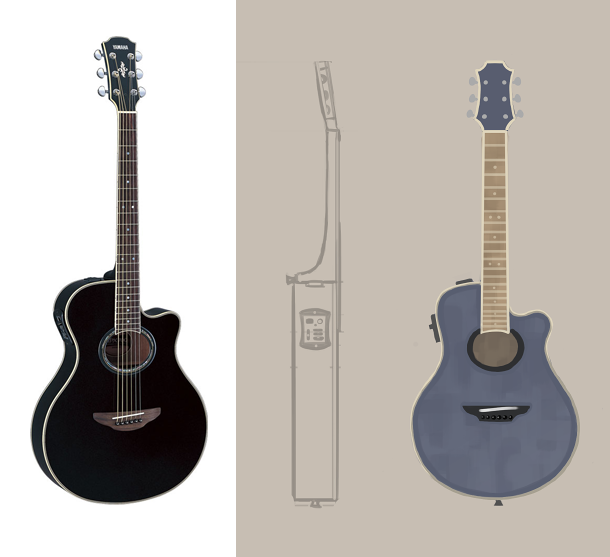
I decided to model my beloved Yamaha APX700 – an Electro-Acoustic guitar I’ve owned and loved for the best part of 5 years. It’s nothing fancy, but it plays like a dream and suits me well.
The first step was to draw up a set of orthographic designs – useful for the next stage of modelling but also my chance to adapt and stylise the shape, colours and overall feel of the guitar. This involved stripping away unnecessary details while exaggerating other aspects to push them away from being too lifelike and give the shapes a ‘chunkier’ cartoon feel.
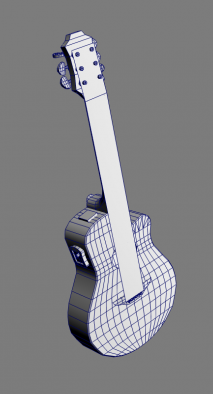 The next stage involved modelling. I’ve often modelled in Maya, but
never with a mind to keep the number of polygons to a bare minimum. I wanted enough detail to
describe the shape of the guitar but wasn’t afraid to show a few faceted curves – it all
added to the desired look.
I also wanted to be mindful of my mesh flow, making sure to avoid any 5 sided polys and general ugliness. I’m sure I could reduce the number of polygons further, particularly on the front face of the guitar body, but I couldn’t quite work out the ‘correct’ way to do this. Besides, I was too proud of my idea to make the strings from just 2 polygons and a transparency map, that it didn’t really seem to matter!
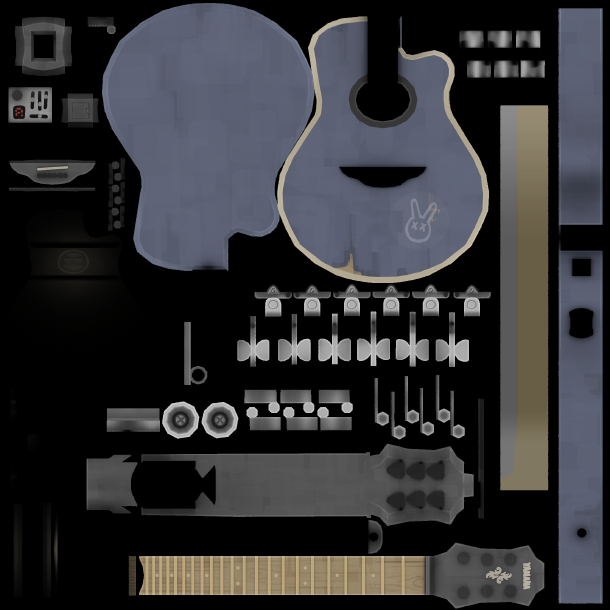
I’m going to jump ahead a little and forgo describing the process of UV mapping in any detail, except to say it was difficult, boring and I probably could have done a much better job. But for a first attempt I’m pretty happy – I tried to prioritise areas with more detail and relegated any hidden faces to the dark gloomy corners of the map.
Below is the finished Diffuse map – it’s made up of all my hand-painted textures and colours multiplied with a baked ambient occlusion map (OK, so I had to use Mental Ray once, but it’s a necessary evil and reasonably quick). I took a couple of cues from the Team Fortress 2 style guide here – firstly to keep the textures as simple as possible and use a blocky ‘potato stamp’ painting style to weather the surfaces slightly, and secondly to add some subtle highlights along the more prominent edges.
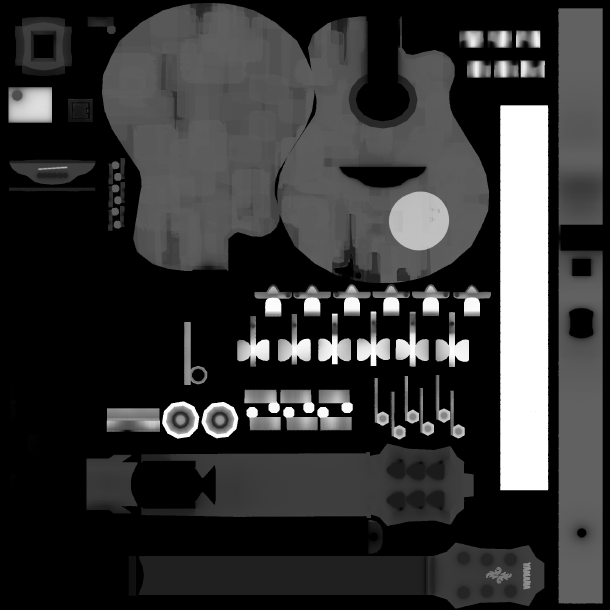
Below the diffuse is the Specular Map – quite simply, the lighter areas will appear more glossy and reflective when viewed at an angle relative to a light source.
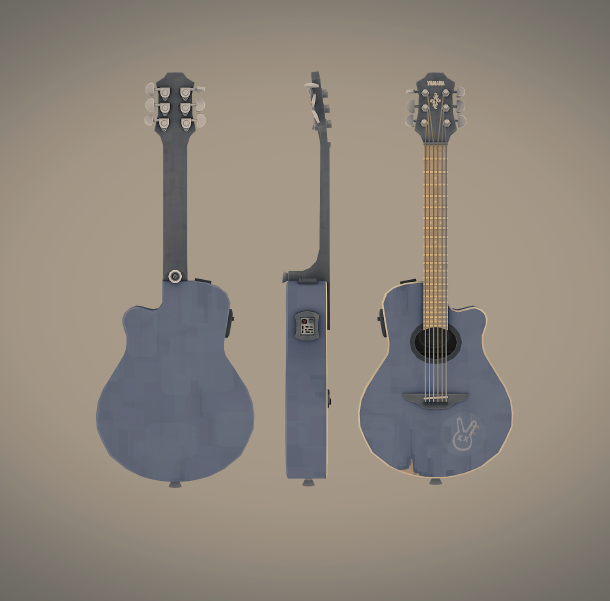
The image above is a very simple ‘full bright’ render showing the model with only the diffuse map applied and no lighting of any kind. I was almost tempted to stop at this point and call it a day, but I couldn’t help trying to push things further and play around with some fancy CGFX shaders that claim to be able replicated the ‘Illustrative Rendering’ technique used in Team Fortress 2 right inside the Maya viewport. Anyone familiar with Maya will know it’s less than accommodating when it comes to working in realtime and even with these shaders I had a hard time getting the desired results.

The first shader I tried was the Generic BRDF shader by Brice that, among other things, lets you use a 2-dimensional image map to control the light-to-shade falloff relative to both the light source and the viewing angle – this means you can easily achieve a dramatic hard edge terminator and warmer/cooler colour tints (I also used this to add a slight bounce on the shaded rim of the object). However, it turns out that having an AMD graphics card meant a lot of the more advanced shader effects didn’t work on my computer, and the latest beta versions failed to even load at all. The 1.1 was the most stable, and allowed me to use the BRDF ramp, but little else.
The next and only other shader that gave me any decent results was the lcUberShader by Leocov, but again most effects didn’t work on my AMD card. Fortunately, Leo had created a ‘AMD compromise’ version of his shader several months ago, and even though he’d taken down the link (due to issues with the Normal Mapping) I was still able to find the file through a old google cache… thus confirming my status as fully fledged net-ninja :)
This shader was perfect, except for two things – the aforementioned normal maps (they didn’t work at all) and the lack of the BRDF style shading, the latter of which being the most important feature I was after. So, I decided to get messy and open up both shader files in TextEdit, scour them down to the bare essentials and compare the differences. After several days up to my knees in some of the most intimidating code I’ve ever encountered I was able to successfully transplant the necessary scripts from the first to the second shader and even fix the Normal map issue while I was at it (that might sound pretty impressive, but it took 5 hours to figure out I only needed to change one word).
I would post a download for this new ‘hybrid’ shader, but I fear Brice and Leo might be inclined to turn up at my house, break both my legs and burn their mutant offspring before it does any harm.
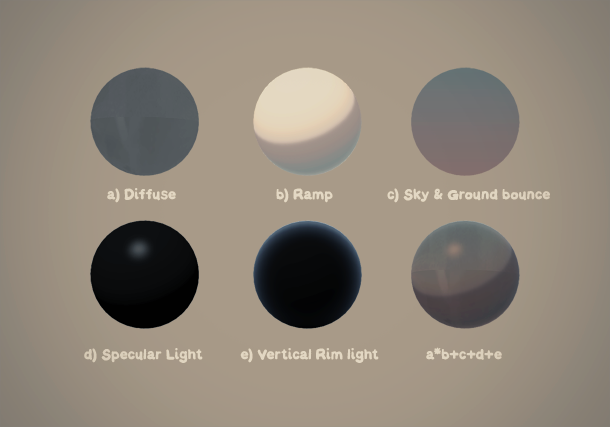
Below is a breakdown of each of the shader effects I’m using and how they work together – and finally, beneath that are a few detailed shots of the shader in action and a 360 animated GIF of the model!
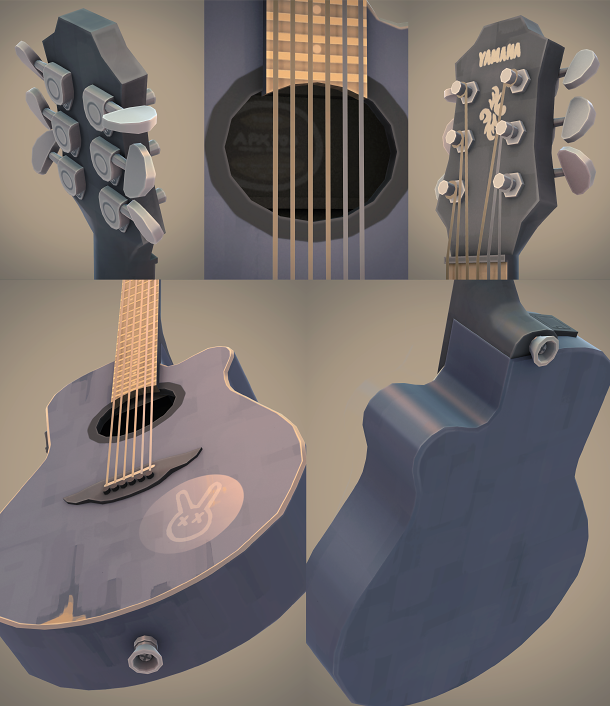
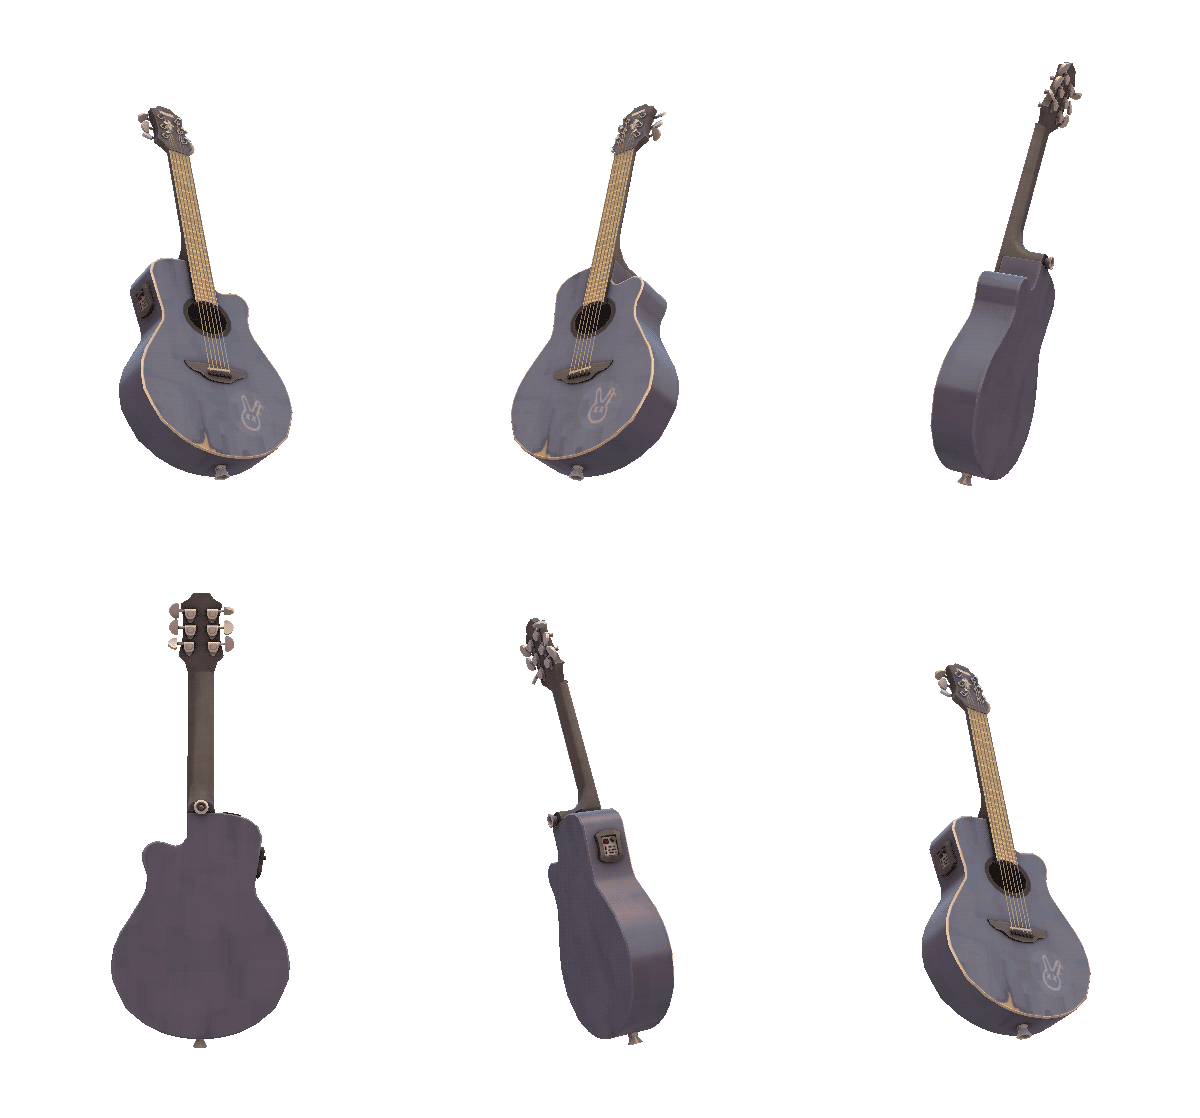
So there we have it! I hope this post has been at least vaguely interest for anybody reading it. I’m hoping to try my hand at modelling a few more objects in the coming weeks and even play around with the idea of producing an animation of some kind further down the line.
Thanks for reading!
-
http://behance.net/cloudyfarm Javier de la Cruz
-
http://www.mentalwarp.com Brice
-
Charles
-
http://N/A Kristoffer
-
http://www.dianadavid.webuda.com Diana
-
http://artllewellyn.wordpresss.com Ritchie Llewellyn
-
http://www.virgil.weebly.com Virgil
-
HogJonny
-
Sacha Danjou
-
riazamin
-
http://pigdev.studio Pigdev